Integrated LED lighting has become a cornerstone of modern home illumination, celebrated for its energy efficiency, longevity, and sleek design possibilities. However, when one of these “bulbs” ceases to shine, many homeowners are left wondering how to proceed. Unlike traditional screw-in bulbs, integrated LEDs are not designed for easy swapping, often leading to frustration and the misconception that an entire fixture replacement is the only solution. The good news is that with the right knowledge and a cautious approach, you can often tackle the task of replacing an integrated LED component yourself, saving both time and money. This comprehensive guide will demystify the process, helping you understand if and how you can safely and effectively restore light to your home.
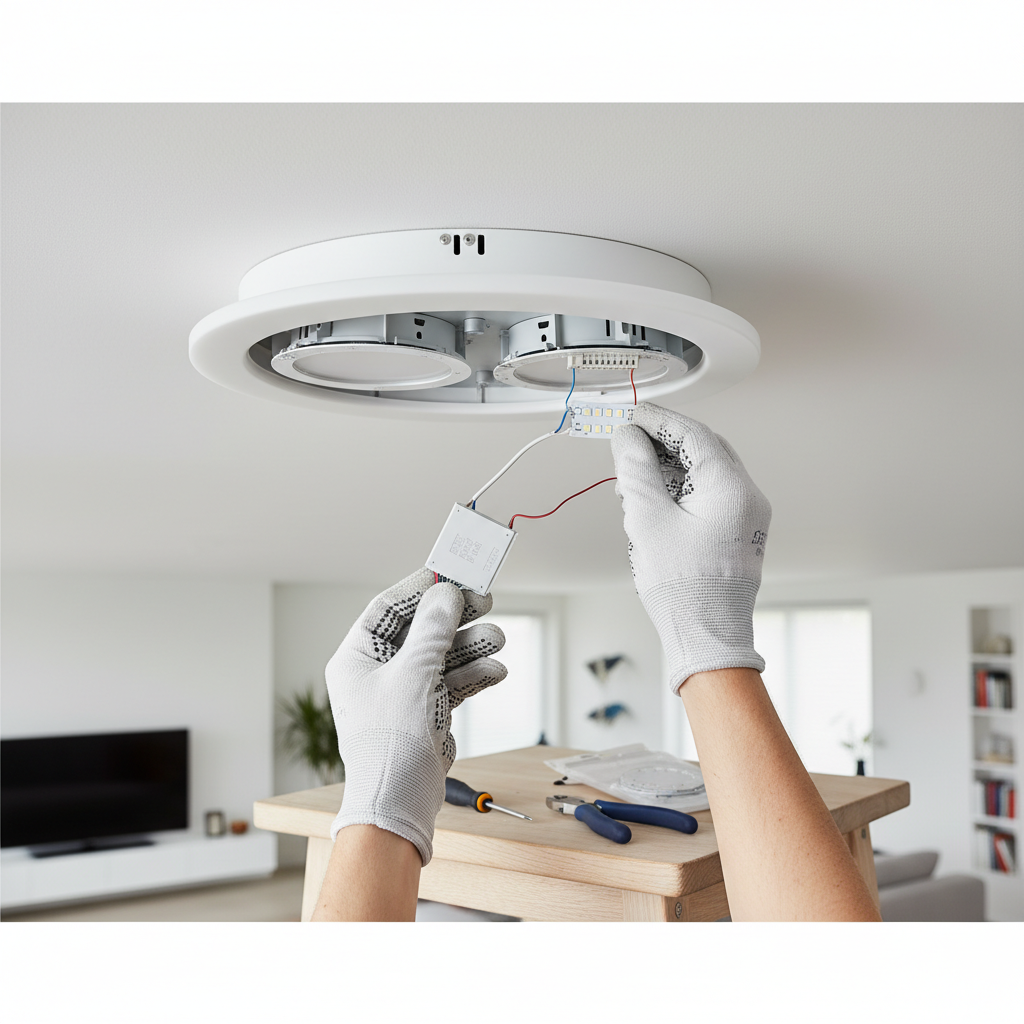
Understanding Integrated LED Lighting
At its core, an integrated LED light fixture incorporates light-emitting diodes (LEDs) directly into the luminaire, eliminating the need for a separate, replaceable bulb. This design allows for incredibly slim profiles, unique shapes, and enhanced thermal management, which is crucial for LED longevity. These fixtures typically consist of several key components working in harmony: the LED chips themselves, a circuit board on which they are mounted, a heat sink to dissipate heat, and most importantly, an LED driver.
The LED driver is a small, often unassuming, electronic device that acts as the power supply, converting the alternating current (AC) from your home’s electrical system into the direct current (DC) that LEDs require. It also regulates the current and voltage, ensuring the LEDs operate within their optimal parameters. This differs significantly from traditional incandescent or halogen bulbs, which simply screw into a socket and operate directly from line voltage. Without a filament to burn out, integrated LEDs themselves rarely fail; instead, the most common culprits behind a malfunctioning integrated LED fixture are usually issues with the LED driver or poor thermal management leading to premature wear on the LED chips.
Is DIY Replacement Always Possible? Setting Expectations
The feasibility of DIY integrated LED replacement largely depends on the specific design of your fixture and the nature of the fault. It’s crucial to set realistic expectations before you begin.
- When It’s Straightforward: Some integrated LED fixtures are designed with replaceable LED modules or easily accessible, modular LED drivers. These are often found in higher-quality or commercial-grade fixtures. If you can identify a standalone module or driver that is connected via simple plugs or screws, replacement can be quite manageable.
- When It’s Challenging: Many consumer-grade integrated LED fixtures are designed as sealed units, where the LED chips are soldered directly to a circuit board that is an integral part of the fixture. In such cases, replacing individual components requires advanced soldering skills, precise knowledge of electronics, and the ability to source compatible parts—tasks typically beyond the scope of a casual DIYer. The lack of industry standardization for LED modules and drivers further complicates finding exact matches.
- When to Consider Full Fixture Replacement: For very inexpensive or older integrated LED fixtures, the cost and effort of sourcing and installing replacement parts might outweigh simply buying a brand new fixture. If the design is proprietary, components are glued in, or multiple individual LED chips have failed, a full fixture replacement often becomes the most practical and cost-effective solution. Sometimes, an upgrade to a newer, more efficient model can even offer better light quality and features.
Safety First: Essential Precautions
Working with electricity always carries risks. Before you touch any wiring or components, prioritize your safety with these essential precautions:
- Always Turn Off Power at the Circuit Breaker: Locate your home’s main electrical panel and switch off the breaker controlling the light fixture you intend to work on. It’s good practice to switch off the main breaker if you are unsure which specific breaker controls the fixture.
- Verify Power Is Off with a Voltage Tester: Never assume the power is off. Use a non-contact voltage tester to confirm that no current is flowing to the fixture. Test multiple points on the fixture’s wiring, if accessible, to be absolutely certain.
- Wear Appropriate Safety Gear: This includes insulated work gloves and safety glasses to protect against potential electrical shocks or debris.
- Use a Stable Ladder: Ensure your ladder is properly set up on a flat, stable surface and is rated for your weight. Avoid overreaching.
Tools and Materials You’ll Need
Having the right tools on hand will make the job smoother and safer.
- Basic Electrical Tools:
- Screwdrivers: Phillips and flathead, for removing covers, mounting screws, and accessing internal components.
- Wire Strippers and Pliers: For cutting and stripping wires if new connections are needed.
- Wire Connectors (Wire Nuts): For securely joining electrical wires.
- Electrical Tape: For insulating connections and securing wires.
- Voltage Tester: Non-contact is safest and easiest to use for verifying power is off.
- Step Ladder: Essential for reaching ceiling or high-mounted fixtures.
- Work Gloves: Insulated gloves provide an extra layer of protection.
- Replacement Parts:
- New LED Fixture (if replacing the whole unit): Ensure it fits the space and meets your lighting needs.
- Compatible LED Driver: If the driver is the fault, you’ll need one with matching voltage (V), current (mA), and wattage (W) specifications.
- Compatible LED Module: If the LED module itself is replaceable, ensure it matches the original’s size, mounting, and electrical specifications.
Step-by-Step Guide to Replacing an Integrated LED Component
Successfully replacing an integrated LED component involves careful diagnosis, safe access, and precise execution.
1. Identifying Your Fixture and the Fault
Before disassembly, try to determine what kind of integrated LED fixture you have and the likely cause of its failure.
- Fixture Type: Is it a flat panel, a recessed can light, a decorative pendant, or a surface-mount fixture? This will dictate how you access the internal components.
- Visible Bulb vs. Integrated: Some fixtures may look integrated but actually use standard, albeit sometimes less common, replaceable LED bulbs (e.g., GU10, MR16, or specialized proprietary bases). If you see something that twists out or clips in like a traditional bulb, that’s your starting point. For true integrated units, there will be no visible “bulb.”
- Diagnosing the Fault:
- Completely Dead: If the light is entirely unresponsive, it could be a failed LED driver, a severe issue with the LED module, or even a loose wire connection.
- Flickering: Often a sign of a failing LED driver, but can also indicate loose connections or overheating.
- Dim or Partial Lighting: Suggests a problem with the LED module itself, possibly individual LED chips failing or a partial driver malfunction.
|
Our Picks for the Best Desk lamp in 2026
As an Amazon Associate I earn from qualifying purchases.
|
||
| Num | Product | Action |
|---|---|---|
| 1 | Motumen Led Desk Lamp for Home Office, Eye-Care Architect Light with Clamp, Smart Double Head Computer Monitor Table Clip Lamp, Adjustable Flexible Goose-Neck, 25 Lighting Models, Task Lamp, Black |

|
| 2 | Voncerus LED Desk Lamp with Clamp, Eye-Caring Clip on Lights for Home Office, 3 Modes 10 Brightness, Long Flexible Goose-Neck, Metal, Swing Arm Architect Task Table Lamps with USB Adapter, Black |
|
| 3 | LED Desk Lamp with USB Ports,Touch Desk Lamps for Home Office with 5 Color Modes,3 Brightness Desk Light with Small Night Light,Reading Lamp Table Lamp for Bedroom Bedside Study Black (with adapter) |
|
| 4 | Airlonv LED Desk Lamp for Office Home, Eye-Caring Desk Light with Stepless Dimming Adjustable Flexible Gooseneck, 10W USB Adapter Desk Lamp with Clamp for Reading, Study, Workbench (Black) |
|
| 5 | CHARYJOD LED Desk Lamp for Office Home, Height Adjustable Architect Desk Light with USB Adapter, Stepless Dimming Desk Lamp Light for Reading, Study, Workbench |
|
| 6 | 15W LED Desk Lamp with USB Charging Ports – Dimmable Table Lamp with 3 Color Temps, 5 Brightness, 4 Timers, Flexible Gooseneck Light with Base, Eye-Caring Reading Light for Home Office, Bedroom, Study |
|
| 7 | Micomlan Led Desk Lamp with Clamp, Architect Desk Lamp for Home Office with Atmosphere Lighting, 24W Ultra Bright Auto Dimming Computer Light Stepless Dimming and Tempering LED Table Light |
|
| 8 | Sailstar Desk Lamp, LED Desk Lamps for Home Office, Wireless Charger Small Desk Lamp with Pen Holder, 3 Color Modes, Dimmable, CRI 85, 800LM, Study Lamps for College Dorm Room, Adapter Included, Black |
|
| 9 | Fenmzee Bedside Table Lamp for Bedroom - 3 Way Dimmable Touch Lamp USB C Charging Ports and AC Outlet, Small Lamp Wood Base Round Flaxen Fabric Shade for Living Room, Desk, LED Bulb Included |
|
| 10 | BOHON LED Desk Lamp with USB Charging Port 3 Color Modes Dimmable Reading Light Intelligent Induction Auto Dimming Task Lamp Neck Flexible Table Lamp for Bedside Office, AC Adapter Include |
|
2. Accessing the LED Component
Once you’ve turned off the power and verified it with a voltage tester, it’s time to open the fixture.
- Removing Covers/Diffusers: Many fixtures have decorative covers, glass shades, or plastic diffusers held by screws, twist-lock mechanisms, or spring clips. Carefully remove these to expose the internal workings. For recessed lights, you might need a flat-blade screwdriver or putty knife to gently pry the trim ring away from the ceiling, revealing spring clips that secure the entire fixture.
- Disconnecting Existing Wiring: For a full fixture replacement or if you need to remove the fixture entirely to access internal components, you’ll need to disconnect the household wiring (typically black, white, and ground wires) from the fixture’s wiring, usually held by wire nuts. Always make a note or take a photo of the connections before disconnecting.
3. Replacing the LED Driver (Common Scenario)
If your diagnosis points to the LED driver as the culprit, here’s how to proceed:
- Locate the Driver: The driver is typically a small, rectangular box or a circuit board, often located within the fixture’s housing or sometimes even in the junction box.
- Note Specifications: Crucially, find the label on the existing driver and record its output voltage (V), output current (mA), and wattage (W). These specifications must match precisely with your replacement driver to ensure compatibility with the LED module.
- Disconnect and Remove Old Driver: Unplug any connectors going to the LED module and disconnect the AC input wires from your household supply. Remove any screws or clips holding the old driver in place.
- Connect New Compatible Driver: Wire the new driver according to its instructions and your recorded connections (AC input to household wiring, DC output to the LED module). Ensure all connections are tight and secure with wire nuts and electrical tape if needed.
4. Replacing the LED Module (If Applicable)
Some fixtures allow for the replacement of the entire LED module.
- Unmount the Old Module: The LED module (the circuit board with the LEDs) is usually attached to the fixture’s base or heat sink with small screws or clips. Carefully remove these.
- Disconnect Wiring: The module will have wires connecting to the LED driver. Disconnect these, noting polarity if applicable.
- Install New Module: Mount the new LED module securely, ensuring good thermal contact with the fixture’s heat sink (this is critical for LED lifespan). Connect the wiring to the driver.
5. Reassembling and Testing
Once the new component is in place:
- Secure All Connections and Components: Double-check all wire connections, ensuring they are snug and insulated. Neatly tuck wires back into the fixture housing or junction box. Secure any replaced drivers or modules.
- Reinstall Covers/Diffusers: Carefully reattach any covers, diffusers, or trim rings you removed earlier.
- Restore Power and Test: Flip the circuit breaker back on and test the light. If successful, congratulations! If not, turn off the power immediately and re-check your connections and component compatibility.
When to Call a Professional Electrician
While many integrated LED issues can be resolved with DIY efforts, some situations warrant calling a licensed electrician:
- Uncertainty About Wiring: If you are ever unsure about the wiring diagrams, proper connections, or dealing with exposed electrical components, it’s best to consult a professional.
- Complex, Inaccessible Systems: Some sophisticated integrated lighting systems, especially those part of smart home setups or complex architectural designs, might have proprietary components or require specialized tools and expertise to service.
- Multiple Failures or Burning Smells: If multiple integrated lights fail simultaneously, or if you detect any burning smells, flickering that persists after basic troubleshooting, or signs of overheating, it could indicate a more serious electrical issue within your home’s wiring.
- No Compatible Replacement Parts: If you’ve diligently searched but cannot find a compatible LED driver or module for your specific fixture, an electrician can advise on suitable replacement fixtures or custom solutions.
Extending the Life of Your Integrated LED Fixture
Preventative measures can help prolong the life of your integrated LED lighting and minimize the need for future replacements.
- Ensure Proper Ventilation: LEDs generate heat, and effective heat dissipation is key to their longevity. Ensure that your fixtures are not installed in enclosed spaces that trap heat, or that their design allows for adequate airflow.
- Avoid Incompatible Dimmers: If your integrated LED fixture is dimmable, always use LED-compatible dimmers. Using a dimmer designed for incandescent bulbs can damage the LED driver and cause flickering or premature failure.
- Regular Cleaning: Dust and debris can accumulate on heat sinks and diffusers, reducing heat dissipation and light output. Gently clean your fixtures periodically to maintain their efficiency and lifespan.
Conclusion
The evolution of lighting technology has brought us energy-efficient and long-lasting integrated LED fixtures, but their non-traditional design can make replacement seem daunting. However, by understanding the components, identifying the fault, and approaching the task with safety and a step-by-step methodology, many homeowners can successfully replace a faulty integrated LED driver or module themselves. While some situations necessitate a full fixture swap or professional intervention, the satisfaction of a successful DIY repair is immense. Don’t let a dark fixture dim your spirits; assess your integrated LED, gather your tools, and confidently embark on your DIY repair journey. What unique integrated LED fixture do you plan to tackle next?
Frequently Asked Questions
Are integrated LED lights repairable?
Yes, integrated LED lights can often be repaired, though it depends on the specific fixture design and the nature of the fault. The most common repair involves replacing the LED driver, while some fixtures also allow for the replacement of the entire LED module. Repairing individual LED chips typically requires specialized soldering skills and is often not cost-effective for most homeowners.
How long do integrated LED bulbs last?
Integrated LED lights are known for their exceptional longevity, often rated to last between 25,000 to 50,000 hours, or even more. This translates to many years of use under typical household conditions. However, component failures, especially with the LED driver or due to poor thermal management, can sometimes shorten their lifespan.
What does an LED driver do?
An LED driver is a crucial electronic component that converts the high-voltage alternating current (AC) from your home’s electrical supply into the low-voltage direct current (DC) required by LED chips. It also regulates the current and voltage to ensure the LEDs operate efficiently, safely, and at their intended brightness, preventing damage and extending their lifespan.
Can I put a regular bulb in an integrated LED fixture?
No, you cannot put a regular incandescent, halogen, or even a standard screw-in LED bulb into an integrated LED fixture. Integrated fixtures are designed with built-in LEDs and typically lack the traditional sockets for replaceable bulbs. Attempting to force an incompatible bulb could damage the fixture, create an electrical hazard, or simply not work.
Why are my integrated LEDs flickering?
Flickering in integrated LED lights is most commonly caused by a failing LED driver that can no longer supply stable current. Other causes include incompatible dimmer switches, loose electrical connections, voltage fluctuations in your home’s wiring, or, less frequently, overheating of the LED chips. Troubleshooting usually begins with checking the driver and connections.
Is it cheaper to replace an integrated LED fixture or repair it?
The cost-effectiveness of replacing versus repairing an integrated LED fixture varies. If only the LED driver needs replacing and a compatible part is readily available, repair can be significantly cheaper. However, for inexpensive fixtures where finding replacement modules is difficult or for designs that require extensive disassembly, replacing the entire fixture with a new one might be the more economical and time-efficient option.