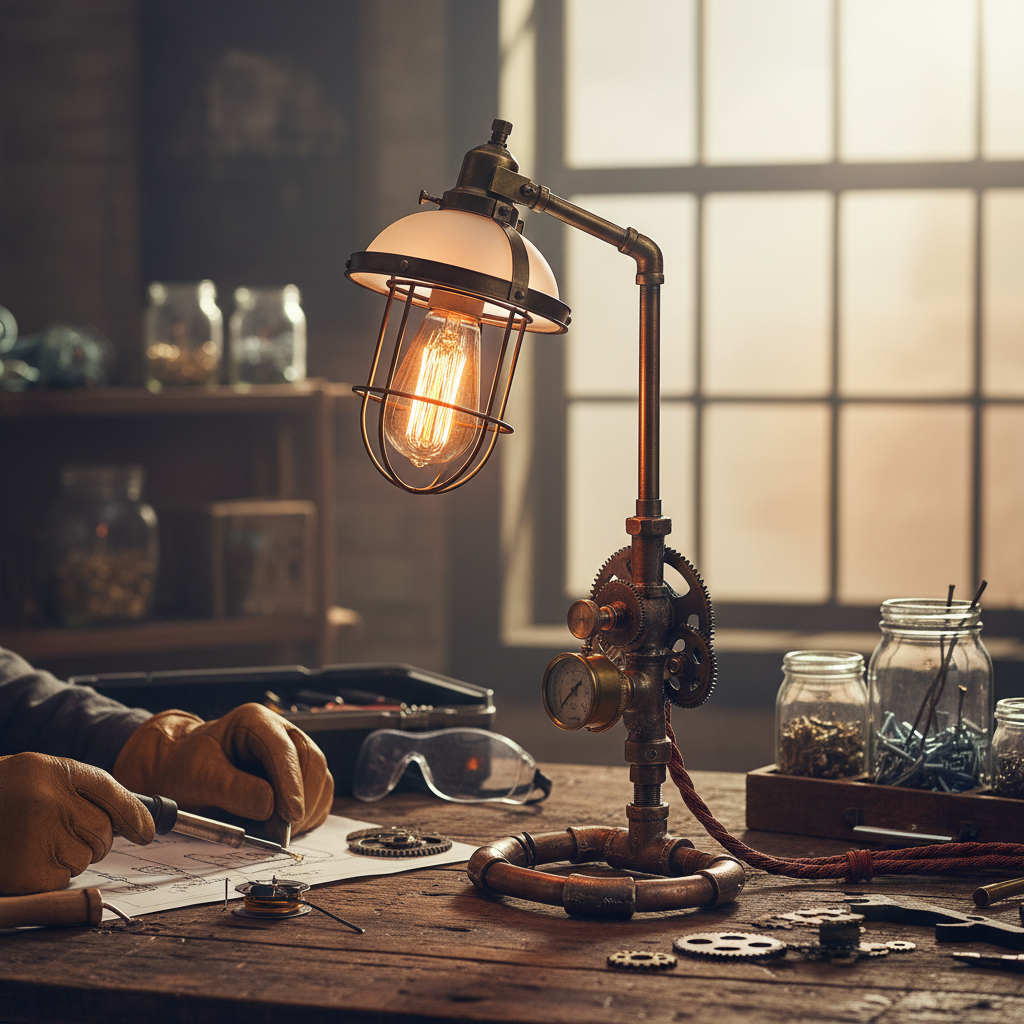
Imagine a piece of decor that’s not just functional, but a conversation starter, a focal point, and a testament to your creativity. A Steampunk desk lamp embodies this perfectly, blending the intricate gears and industrial aesthetics of a bygone era with modern illumination. If you’ve ever dreamt of crafting something truly unique for your workspace or living area, building your own Steampunk desk lamp is an incredibly rewarding project. It’s an opportunity to merge artistry with engineering, creating a distinctive fixture that radiates both vintage charm and personal flair.
Understanding Steampunk Aesthetics in Lighting
Steampunk is a fascinating subgenre inspired by 19th-century industrial steam-powered machinery, blended with the romanticism of the Victorian era. When translated into lighting, this aesthetic often features exposed pipes, gears, gauges, and robust metalwork, frequently combined with warm, glowing Edison bulbs. The allure lies in its celebration of craftsmanship, function, and a nostalgic vision of technological advancement. A Steampunk desk lamp isn’t merely a light source; it’s a miniature sculpture, telling a story of intricate mechanics and imaginative design. It allows for incredible personalization, transforming ordinary materials into something extraordinary.
Essential Materials and Components for Your Steampunk Creation
Embarking on a DIY Steampunk desk lamp project requires a thoughtful selection of materials that capture the essence of the style while ensuring functionality and safety.
Structural Elements: The Industrial Backbone
The core of most Steampunk lamps relies on industrial piping.
- Pipes and Fittings: Black iron or galvanized steel pipes are popular choices, offering a rugged, authentic industrial look. Copper pipes can also be used for a warmer, more refined aesthetic. You’ll need various fittings like elbows, tees, flanges, and nipples to construct the lamp’s shape. These pieces screw together, allowing for a robust and customizable structure.
- Base Materials: A sturdy base is crucial for stability and to house wiring. Common choices include a thick piece of wood (like reclaimed timber for added character), a heavy metal plate, or even a repurposed industrial object.
|
Our Picks for the Best Desk lamp in 2026
As an Amazon Associate I earn from qualifying purchases.
|
||
| Num | Product | Action |
|---|---|---|
| 1 | 15W LED Desk Lamp with USB Charging Ports – Dimmable Table Lamp with 3 Color Temps, 5 Brightness, 4 Timers, Flexible Gooseneck Light with Base, Eye-Caring Reading Light for Home Office, Bedroom, Study |

|
| 2 | Voncerus LED Desk Lamp with Clamp, Eye-Caring Clip on Lights for Home Office, 3 Modes 10 Brightness, Long Flexible Goose-Neck, Metal, Swing Arm Architect Task Table Lamps with USB Adapter, Black |
|
| 3 | Airlonv LED Desk Lamp for Office Home, Eye-Caring Desk Light with Stepless Dimming Adjustable Flexible Gooseneck, 10W USB Adapter Desk Lamp with Clamp for Reading, Study, Workbench (Black) |
|
| 4 | LED Desk Lamp with USB Ports,Touch Desk Lamps for Home Office with 5 Color Modes,3 Brightness Desk Light with Small Night Light,Reading Lamp Table Lamp for Bedroom Bedside Study Black (with adapter) |
|
| 5 | Micomlan Led Desk Lamp with Clamp, Architect Desk Lamp for Home Office with Atmosphere Lighting, 24W Ultra Bright Auto Dimming Computer Light Stepless Dimming and Tempering LED Table Light |
|
| 6 | BOHON LED Desk Lamp with USB Charging Port 3 Color Modes Dimmable Reading Light Intelligent Induction Auto Dimming Task Lamp Neck Flexible Table Lamp for Bedside Office, AC Adapter Include |
|
| 7 | Sailstar Desk Lamp, LED Desk Lamps for Home Office, Wireless Charger Small Desk Lamp with Pen Holder, 3 Color Modes, Dimmable, CRI 85, 800LM, Study Lamps for College Dorm Room, Adapter Included, Black |
|
| 8 | Fenmzee Bedside Table Lamp for Bedroom - 3 Way Dimmable Touch Lamp USB C Charging Ports and AC Outlet, Small Lamp Wood Base Round Flaxen Fabric Shade for Living Room, Desk, LED Bulb Included |
|
| 9 | CHARYJOD LED Desk Lamp for Office Home, Height Adjustable Architect Desk Light with USB Adapter, Stepless Dimming Desk Lamp Light for Reading, Study, Workbench |
|
| 10 | Motumen Led Desk Lamp for Home Office, Eye-Care Architect Light with Clamp, Smart Double Head Computer Monitor Table Clip Lamp, Adjustable Flexible Goose-Neck, 25 Lighting Models, Task Lamp, Black |
|
Electrical Components: Bringing Light to Life
Safety and functionality are paramount when it comes to the electrical aspects.
- Lamp Cord: A vintage-style cloth-covered lamp cord adds to the aesthetic, but any standard two-wire or three-wire (grounded) lamp cord will work.
- Light Socket: Choose a standard E26/E27 medium base socket to fit common bulbs. Metal or ceramic sockets often complement the industrial look better than plastic ones.
- Edison Bulb: These vintage-style bulbs with visible filaments are practically synonymous with Steampunk lighting, casting a warm, inviting glow. Consider LED Edison bulbs for energy efficiency and longevity.
- Switch: An inline rotary switch, a toggle switch, or even a creatively integrated faux valve handle switch can serve as your on/off mechanism.
- Plug: A standard two-prong or three-prong (grounded) plug, matching your lamp cord.
Decorative Accents: The Steampunk Flair
This is where your lamp truly comes to life, reflecting the intricate details of the genre.
- Gears and Cogs: Salvaged clock parts, bicycle gears, or decorative metal gears can be strategically attached to the pipes or base.
- Gauges and Meters: Old pressure gauges, voltmeters, or even replica instruments add a scientific, industrial touch.
- Valves and Vintage Hardware: Non-functional brass or copper valves, old spigots, and other antique hardware pieces enhance the mechanical feel.
- Vacuum Tubes or Springs: These can be integrated for an authentic retro-futuristic laboratory look.
- Found Objects: Old keys, chains, clock hands, and other curiosities can be incorporated to tell a unique story.
Finishing Supplies: The Final Polish
- Degreaser and Sandpaper: Essential for cleaning pipes and preparing surfaces for painting or clear coating.
- Clear Coat/Sealer: To protect raw metal or wood and prevent rust.
- Paint (Optional): If you wish to unify disparate metal pieces or add specific color accents.
- Epoxy or Strong Adhesive: For securing decorative elements or the switch mechanism.
Tools You’ll Need
Having the right tools makes the project smoother and safer.
- Basic Hand Tools:
- Pipe Wrenches: For tightening pipe fittings securely.
- Screwdrivers: Various sizes for electrical connections and attaching elements.
- Wire Strippers and Cutters: Essential for preparing electrical wires.
- Drill and Drill Bits: For making holes in the base, pipes (for wire exit points), and mounting decorative pieces.
- Vice: Extremely helpful for holding pipes and other components steady while drilling or assembling.
- X-Acto Knife: For delicate cutting of wire insulation or other small tasks.
- Safety Gear:
- Safety Glasses: Protect your eyes from metal shavings, flying wire pieces, or chemical splashes.
- Work Gloves: To protect your hands from sharp edges, chemicals, and to get a better grip on pipes.
- Voltage Tester: Absolutely critical for confirming circuits are de-energized before handling wires.
Step-by-Step Guide to Building Your Steampunk Desk Lamp
Creating your own Steampunk desk lamp is a journey of discovery and craftsmanship. Follow these steps to bring your vision to light.
Step 1: Design and Plan Your Vision
Before you start assembling, visualize your lamp. Sketch out a few designs, considering the height, shape, and overall footprint. Lay out your pipes and fittings on a flat surface to dry-fit them, experimenting with different configurations until you find a shape you like. This is also the time to decide where the electrical cord will enter and exit the pipe structure, and where the switch will be located. Marking these points early prevents rework later.
Step 2: Prepare Your Materials
Clean all metal pipes and fittings thoroughly. New pipes often come with a protective oily coating that needs to be removed. Use a degreaser and a stiff brush, then wipe them dry. If using reclaimed wood for the base, sand it smooth and apply any desired stain or finish. Preparing the base often involves drilling a central hole for the main pipe and a channel for the power cord to exit, ensuring the lamp sits flush.
Step 3: Assemble the Structure
Begin by attaching the first pipe fitting (e.g., a floor flange) to your chosen base. Then, carefully screw together your pipe pieces and fittings according to your design. Do not over-tighten them initially, as you’ll need some flexibility for wire routing. Once the main structure is built, gently test its stability.
Step 4: The Electrical Work (Safety First!)
This step involves working with electricity and must be approached with extreme caution.
- Wiring the Socket: Carefully separate the two insulated wires of your lamp cord. Strip about ¾ inch of insulation from each wire end. Connect one wire to each terminal screw inside the lamp socket. Ensure there are no stray wire strands that could cause a short circuit.
- Integrating the Switch: If using an inline switch, cut one of the lamp cord wires (the ribbed or unmarked one, typically the neutral) and strip the ends. Connect these ends to the terminals of your switch. If using a custom valve-style switch, you might need to secure a small rotary switch inside the valve handle using strong epoxy and connect it similarly.
- Connecting the Plug: Follow the instructions provided with your plug. Typically, the smooth wire connects to the narrow prong (hot), and the ribbed wire connects to the wider prong (neutral). If using a grounded plug, connect the green or bare copper wire to the ground terminal.
“Electrical safety is non-negotiable. Always treat wires as live until you’ve personally verified the power is off with a voltage tester. A moment of carelessness can lead to serious injury.” – John Peterson, Master Electrician & DIY Safety Advocate
Step 5: Route the Wiring
This can be the trickiest part. Carefully feed the lamp cord through your assembled pipe structure. Start from the base and push it through each section, pulling it out gently as you add more pipe pieces. Use a piece of stiff wire or a fish tape if you encounter difficulty. Ensure the wire is not pinched or abraded by any sharp edges inside the pipes, especially at drilled holes; use a small file to smooth any rough edges. Leave enough slack at the top to connect to the socket and enough at the bottom for the plug and any base wiring.
Step 6: Add Steampunk Details and Finishing Touches
Once the wiring is routed and the lamp structure is solid, you can add your decorative elements. Use strong epoxy or metal adhesive to attach gears, gauges, and other salvaged items. Securely fasten your chosen switch in its designated spot. After all decorative elements are in place, apply a clear coat or paint to the entire lamp to protect the metal and enhance its appearance. Consider a hammered metallic spray paint for an aged, industrial look.
Step 7: Final Test and Placement
Before plugging in your lamp, double-check all electrical connections for tightness and proper insulation. Once you are confident, insert your Edison bulb and plug the lamp into an outlet. Switch it on! Observe the warm glow and admire your handiwork. Place your unique Steampunk desk lamp on your desk, workbench, or as an accent piece in your living room, enjoying the personalized ambiance it creates.
Important Electrical Safety Considerations
Safety cannot be stressed enough when working with electricity.
- Always Disconnect Power: Before starting any electrical work on your lamp, ensure it is unplugged. If you are integrating a wall switch, turn off the power at the main circuit breaker.
- Use the Correct Tools and PPE: Employ insulated tools, wear safety glasses, and use work gloves to protect yourself.
- Verify Voltage: Always use a non-contact voltage tester to confirm that no current is flowing through the wires before you touch them.
- Choose UL-Listed Components: Select lamp sockets, cords, and switches that are UL (Underwriters Laboratories) listed. This indicates they meet specific safety standards.
- Avoid Over-Lamping: Never use a bulb with a wattage higher than what your lamp socket or fixture is rated for.
- Know Your Limits: If you are unsure about any electrical step, consult a qualified electrician. It’s better to be safe than sorry.
Customization and Inspiration
The beauty of DIY Steampunk is the endless possibility for customization. Don’t feel limited to pipes and gears.
- Material Exploration: Combine pipes with vintage wood, repurpose old camera tripods, or integrate elements from antique typewriters for truly unique bases and structures.
- Bulb Variety: While Edison bulbs are classic, experiment with different filament patterns or even small, exposed LED arrays for a more modern-industrial twist.
- Unique Switch Mechanisms: Instead of a simple toggle, consider incorporating a repurposed pressure valve handle that, when turned, activates a hidden switch.
Conclusion
Crafting a Steampunk desk lamp at home is more than just a DIY project; it’s an opportunity to create a functional piece of art that reflects your passion for unique design and hands-on creation. From the rugged pipes and intricate gears to the warm glow of an Edison bulb, each element contributes to a narrative of industrial elegance. By carefully selecting your materials, adhering to essential safety guidelines, and embracing your creativity, you can bring a truly distinctive and personal lighting solution into your space. So, gather your tools and materials, ignite your imagination, and embark on the rewarding journey of building your own Steampunk masterpiece. What story will your lamp tell?
Frequently Asked Questions
How long does it typically take to build a Steampunk desk lamp?
The time required can vary greatly depending on the complexity of your design and your DIY experience. A simpler pipe lamp might take a few hours, while more elaborate designs with intricate wiring and numerous decorative elements could take a full weekend or even longer, spread across several sessions.
Are Steampunk desk lamps safe to build for beginners?
While the mechanical assembly of pipes can be beginner-friendly, the electrical wiring component requires careful attention to safety. If you are new to electrical work, research thoroughly, follow all safety guidelines meticulously, and consider consulting with or getting help from someone experienced in basic home wiring.
What are the best places to find unique Steampunk lamp components?
Excellent sources for Steampunk materials include hardware stores for pipes and fittings, antique shops, flea markets, and salvage yards for gears, gauges, and other unique found objects. Online marketplaces also offer a wide array of specialized Steampunk components and vintage-style electrical parts like Edison bulbs.
Can I use different types of metal pipes for the lamp structure?
Yes, you can use various types of metal pipes, including black iron, galvanized steel, or copper. Black iron offers a raw, dark industrial look, while galvanized steel has a lighter, more uniform finish. Copper pipes provide a warm, often polished aesthetic. Ensure all chosen pipes and fittings are compatible in terms of threading and size.
How do I ensure my DIY Steampunk lamp is stable and won’t tip over?
The key to stability lies in a heavy and well-balanced base. Choose a substantial piece of wood or metal for the base, ensuring its dimensions are appropriate for the height and overall spread of your pipe structure. Distribute the weight evenly, and if necessary, incorporate additional weight into the base to prevent tipping.